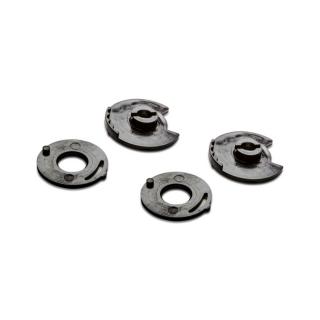
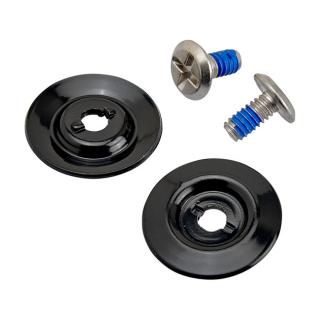
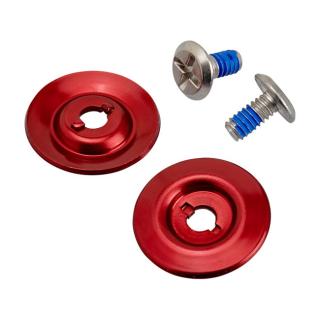
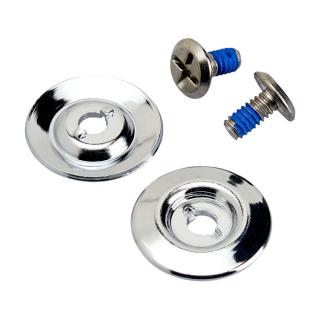
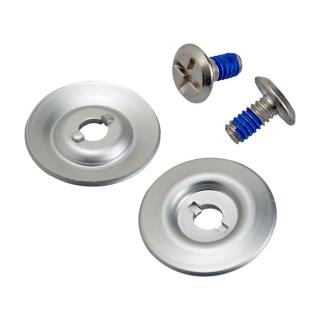
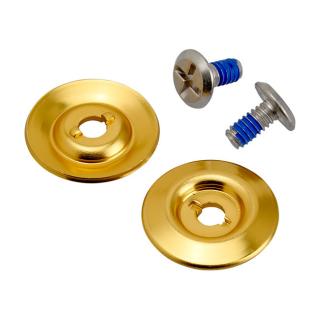
This is a complete pair (4 pieces in total) of replacement baseplates for Gen 2 Biltwell Gringo S and Lane Splitter face shields. This kit will also allow you to fit a Gen 2 shield on any earlier Biltwell Gringo S or Lane Splitter helmets or is a direct replacement on Gen 2 helmets. Fits: > for Gen 2 Biltwell Gringo S and Lane Splitter face shields
This is a pair of replacement baseplates for Gen 1 Biltwell Gringo S and Lane Splitter helmets. This kit will allow you to repair or replace the baseplates that mount Gen 1 Gringo S and Lane Spitter helmet’s original shield. Fits: > Biltwell Gringo S and Lane Splitter
With stainless steel screws. Sometimes subtle details are the loudest custom statement you can make. Our hardware kits for Gringo S and Lane Splitter shields come in anodized colors so you can fine-tune the look of your helmet. NOTE! Apply one drop of medium-strength blue Loc-Tite on the threads of each screw during installation. Align the index bumps on the back side of the washers with their corresponding slots on the plastic hinge spacer behind the shield; hold the washer carefully in position while yo
Novinka pro sezonu 2017 od Biltwell s homologací ECE, helma kterou musíte mít! Má čiré hledí a jedná se o první BILTWELL s ECE! Přívody vzduchu v oblasti brady dávají helmě agresivní a velmi zvláštní vzhled. To je důvod, proč se jí říká Lane Splitter
Řidítka Biltwell H2 Bar - Black Smooth Svařované technologií - TIG 4130 chrom; Rozměry: 24 5/8 široká x 8 5/8 výška Vhodné pro:> 82-19 H-D (88-11 Springers)
Rub-ons, die-cuts, TDC's, whatever you call them, these are the kind of high-quality stickers of Biltwell you stick on and then peel off the translucent paper backing. They work great on doors and windows, tool boxes or any other flat surface. Two different logos are available in three sizes each and in regular black vinyl or 3M white reflective. Fits: > Almost everywhere
With stainless steel screws. Sometimes subtle details are the loudest custom statement you can make. Our hardware kits for Gringo S and Lane Splitter shields come in anodized colors so you can fine-tune the look of your helmet. NOTE! Apply one drop of medium-strength blue Loc-Tite on the threads of each screw during installation. Align the index bumps on the back side of the washers with their corresponding slots on the plastic hinge spacer behind the shield; hold the washer carefully in position while yo